Saturday, July 31, 2010

Peas with Green Onions and Basil

groweatsave

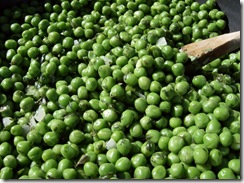
My Sweet Basil finally decided to grow. One day it just decided to start shooting up. No sooner had I started enjoying pinching leaves and it began to flower. Such is the life of a gardener! This week, in between drying the leaves, I have been adding basil to as many of our meals as I can. The natural sweetness of basil is the perfect compliment to peas and green onions.

Ingredients:July2010 293

1 lb. fresh peas 
2 Tablespoon butter
1/4 cup green onions
2 Tablespoons fresh parsley, chopped
1 Tablespoon fresh basil, diced

Directions:

Place peas in a steaming basket, and add basket to boiling water(do not let the water touch the peas). Steam for 2 minutes or until the peas are just barely tender.

While peas are steaming, melt butter; add green onions; cook until tender but not brown. Stir in peas, parsley, and basil. Cook covered over medium-low heat for 5 minutes or until tender.

What is your favorite way to use basil?

Visit $5 Dinners to view more recipes using fresh herbs or add your own to the list.

Friday, July 30, 2010

My Favorite Drought Tolerant Plant: Russian Sage

July2010 240

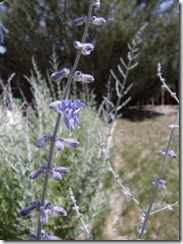
Today is Flaunt Your Flowers/Fertilizer Friday at Tootsie Time, but I will only be flaunting my Russian Sage. No fertilizer for these plants; they thrive in poor soil, of which I have plenty! Russian Sage is hands down my favorite drought tolerant plant. Not only does it require little water and lots of sun, but it can handle the temperature extremes that exist in the high desert. Its long spikes of purple flowers open in the heat of the summer, just as most of my other flowers are crying uncle, and continues blooming well into the fall.

Russian Sage dies back to the ground in the winter, but I do not trim the branches until the spring. Most sources I’ve read say that leaves will only bud on new shoots. However, I have observed that buds do appear on some of the old woody material, so I wait until the leaves start to emerge and then trim accordingly.

My plants reach about 3 feet wide and 4 feet high each summer. I use them through out my yard, but my favorite use of them was in creating a wall between my garden and my son’s play area:July2010 272 The wall of flowers serves several purposes. The blooms attract pollinators toJuly2010 229 my garden area, the strong sage scent hides the smells coming from the back pasture, and the thick branches prevent a lot of flying balls from crushing my veggies.

It is difficult to start Russian Sage from seed, but you can easily start a new plant from a cutting of new growth. You should keep it in moist soil until it takes off. Once it is established, you can cut back to watering it briefly 2 –3 times a week.

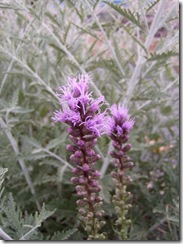
What more can I ask for? Oh yeah, it is not just rabbit resistant, it is almost a rabbit repellant, so I use it to protect flowers that the rabbits like to eat like my irises, daffodils, tulips, and  Liatris Spicata (pictured at right).

What is your favorite drought tolerant plant? Or are you one of those blessed people who actually receive measurable amounts of rain?

Tuesday, July 27, 2010

My Square Foot Gardens

I have spent most of the spring and summer lamenting the condition and rate of production of my raised bed gardens, so it only seems fair that I should share the positive developments.

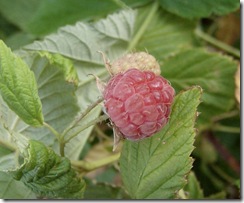
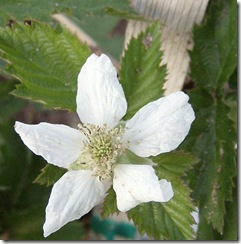
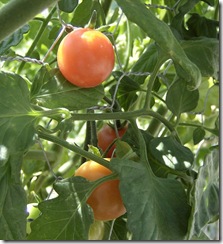
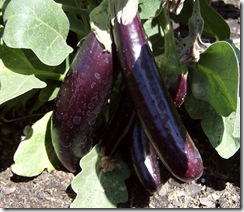
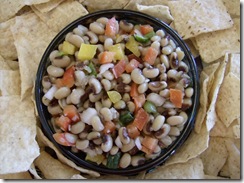
I am beginning to harvest raspberries: July2010 231 It won’t be long before I am harvesting blackberries:July2010 109I am regularly picking tomatoes, which are added to salads of lettuces, chard, and radishes from the garden. July2010 242The eggplants are developing nicely. Now I just have to figure out a way to cook them so that my husband and children will eat them. July2010 244I don’t have pictures of the herbs, onions, and peppers growing in the garden, but they are featured in this dip: July2010 201Needless to say, I am thrilled to finally have an opportunity to enjoy the fruits of my labor! Do you grow your own fruits and veggies? Have you had an unusually trying time gardening this year?

To view lovely gardens from around the country, visit Bloomin’ Tuesday and Tuesday Garden Party.

Friday, July 23, 2010

Daylilies and Repurposing Their Stems

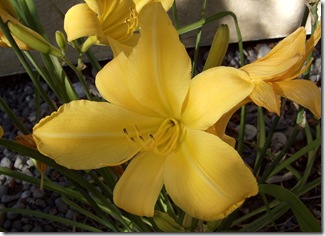
July2010 233I love my Daylilies! They grow in all types of soil conditions as long as it is well drained. They prefer sun, but tolerate shade. They winter well and can survive extreme heat as long as they receive an inch of water a week. If the rabbits did not like them so much, they would be on my short list of perfect flowers. I have found that the rabbits will not traverse rocks to eat them, so a little landscaping has allowed me to spend less time channeling Mr. McGregor and more time enjoying my flowers.July2010 239

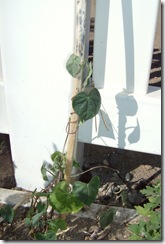
I have not decided if the tip I am about to share falls under the category of  frugal and green or cheap and lazy; I will let you decide. When my daylilies have stopped blooming, I pinch the dead blooms, so they don’t go to seed, but I do not cut back their stems. Instead I let them dry until I can just twist the dead stems out. Then I have a free, eco-friendly, biodegradable stake to use for my morning glory seedlings.  The dried stems are also perfect for staking peas and green beans when I start them inside before the last frost. They are 2 – 3 feet tall, but very light weight. When I transfer the plant outdoors, I can leave the make do stake with the seedling rather than risk doing damage to the plant by removing it. So what do you think? Am I hiding behind a frugal and green cover, while truly being cheap and lazy?

To view gardens from around the world, visit Fertilizer Friday at Tootsie Time.fertilizer Friday

Tuesday, July 20, 2010

Butterfly Bush

bb5

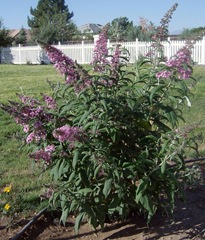
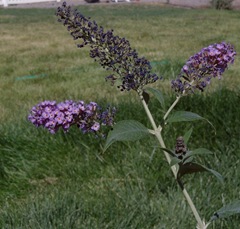
Butterfly Bushes definitely live up to their name. I have a dozen of these bushes scattered through out the backyard and my children and I love watching the butterflies flit from bush to bush.

I think I would enjoy these hardy plants even if they didn’t attract so many butterflies, bees, and hummingbirds. They require very little water, do not mind poor soil, are unfazed by 100 degree heat, and can survive –20 degree winters. Around here they are known as easy keepers!  bb10

The bushes in my backyard, die back to the ground in the winter. I have a microclimate which is a little warmer in the front yard and the bushes there remain green year round. I advise putting several inches of mulch around the plants in the fall if you live in zones 4 – 6, to help them weather the winter.

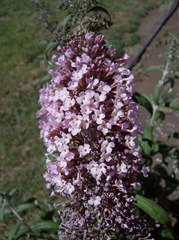
I have bushes with pink, white, and lavender flowers, though none of the white flowers have opened yet. They remind me of lilacs with all of their little trumpet flowers.  They differ from lilacs, in that they do not have a short flowering season. They will bloom from spring to fall, unless they are under unusual stress (Once the temperatures reach the mid 90’s my Butterfly Bushes stop producing new flowers. They resume once the temperatures drop back to the 80’s).

bb1The flowers start opening from the base and work their way to the tip of the spike.  They do not drop their blooms once they are done flowering, so they must be pruned.  I don’t think there is any agreed upon way to prune Butterfly Bushes, though most gardeners  agree that they are very forgiving and will survive just about any pruning they receive.

In the picture to the left, is a spent flower, flanked by two blooming spikes, with another flower beginning to form lower on the branch.

For more beautiful flowers visit Bloomin’ Tuesday and Tuesday Garden Party.

Monday, July 19, 2010

How to Make Hollyhock Dolls and Use Them to Decorate Cupcakes

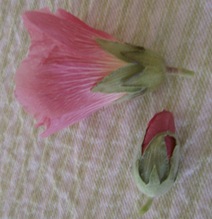
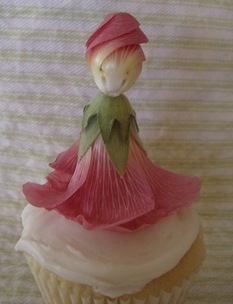
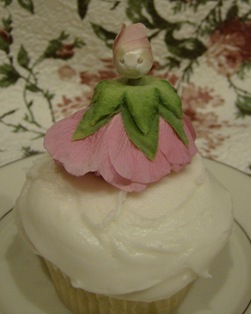
My childhood was populated with hollyhock fairies. They are fast and easy to make and can be made without any tools. Hollyhocks are edible, so the hollyhock dolls make an elegant, but frugal decoration for cupcakes. You need to rinse the hollyhocks well, if you are going to use them to decorate cupcakes.July2010 183

You need:

1 hollyhock bud 

1 partially opened hollyhock flower

scissors (optional)

toothpick (optional)

Directions:

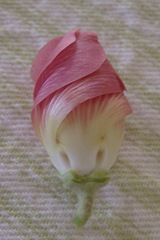
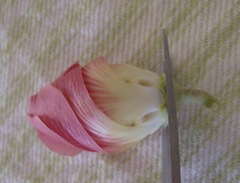
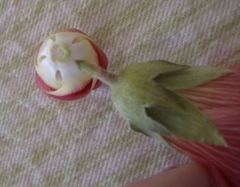
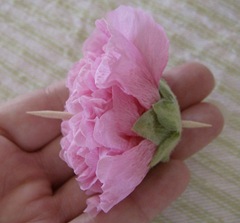
1. Pull off the sepal petals on the bud to expose the “eyes”:July2010 1842. Pull or cut off the stem to create the “mouth”:July2010 185 3. Insert the stem of the flower into one of the holes in the bud:July2010 186 Now stand your hollyhock doll up and she is ready for the party:July2010 189You can use a toothpick to make your doll more secure. Insert it through the middle of the hollyhock, leaving a bit of toothpick sticking out on top to attach the head, and a little on bottom to insert it into a cupcake:July2010 188  Once the head is attached you can stick the toothpick into a cupcake:July2010 178

You can also add rosemary or lavender twigs for arms if you choose. I doubt that most people will want to eat their hollyhock doll, but they can if they want to. The petals are slightly sweet, but the white portion of the bud is bitter and is avoided when used for culinary purposes.

N.B. I used this Honey Cake recipe to make the cupcakes and I frosted them with Butter Cream Frosting.

This post has been linked to Tasty Tuesday, Tempt My Tummy Tuesday, and Cupcake Tuesday.

Saturday, July 17, 2010

Vegetable Garden Lasagna

July2010 168
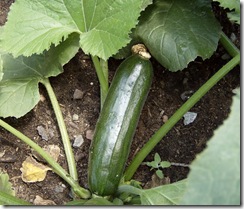
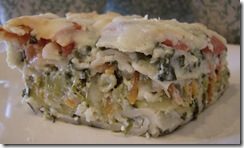
Many of my vegetables are coming in late and small, even the zucchini. I am trying not to ruminate on the fact that I was canning this time last year. Trying being the operative word! When I am not indulging in a pity party, I am focusing on recipes that will highlight the few, small veggies that I do have.One of my favorites is Vegetable Lasagna, which uses a little bit of lots of different vegetables. Perfect for my 2 small zukes and 4 roma tomatoes. I also used fresh herbs from my garden, homegrown onions and garlic, and spinach that I froze when I was being overrun last month. Just writing that list make me feel a little bit better about my vegetable garden.

If you have been fortunate enough to be overrun with yellow squash and zucchini, then visit here for a compilation of recipes that feature summer squash.

Ingredients (please don't be overwhelmed by the list):

12 lasagna noodles ( I used rice noodles to make this gluten free)) April 2010 252
2 tablespoons olive oil , divided
2 small zucchini, thinly sliced
1 head broccoli, finely chopped
2 carrots, julienned
1 large onion, chopped
1/2 cup chopped green bell pepper
2 small zucchini, thinly sliced
6 cloves garlic, minced
1/2 cup all-purpose flour (I use gluten free flour)
3 cups milk
1/4 cup butter
1 cup Parmesan cheese, divided
oregano
basil
garlic powder
pepper
1 (10 ounce) package frozen chopped spinach, thawed
1 (8 ounce) container small curd cottage cheese
15 ounces ricotta cheese
4 –5 roma tomatoes, thinly sliced
1/4 cup fresh basil, shredded
3 - 4 cups shredded mozzarella cheese, divided

Directions:

1. Heat oil in a large skillet over medium heat. When oil is hot add zucchini. Add a dash of oregano, basil, garlic powder and pepper.  Sauté for 5 –7 minutes. Place zucchini in a dish, but do not rinse out the pan.

2. Reheat the remaining oil in the large skillet adding a little more if necessary. When oil is hot add broccoli, carrots, onions, bell peppers, and garlic. Add a several dashes of oregano, basil, and pepper.  Sauté for 6 - 8 minutes; set aside.

3. Bring a large pot of lightly salted water to a boil. Add lasagna noodles and cook for 10 minutes or until al dente; drain.

4. Melt butter in a medium saucepan. Stir in flour (or cornstarch) then gradually whisk in milk until well blended. Bring to a boil over medium heat. Cook 5 minutes, or until thick, stirring constantly. Stir in 1/2 cup Parmesan cheese and add a dash or two of pepper.  cook for 1 minute or until cheese is melted. Remove from heat; stir in spinach. Reserve 1/2 cup spinach mixture for the topping.

5. In a small bowl combine cottage and ricotta cheeses; stir well.

6. Preheat the oven to 375 degrees and coat a 9 x 13 pan with a light coat of oil.

7. Spread about 1/2 cup of spinach mixture in the bottom of the prepared pan. Layer noodles, ricotta mixture, zucchini, 2 cups of mozzarella cheese, vegetables, spinach mixture, and end with another layer of noodles. Top with reserved spinach mixture, a layer of tomatoes, basil, 1 - 2 cups mozzarella cheese and 1/2 cup parmesan cheese.

8. Bake at 375 degrees  for 30 – 40 minutes, or until lightly browned on top. Cool for approximately 10 minutes before serving. Serves 12.
April 2010 241
To view more recipes inspired by homegrown vegetables, visit Grow. Eat. $ave. at $5 Dinners.

Thursday, July 15, 2010

Hollyhocks

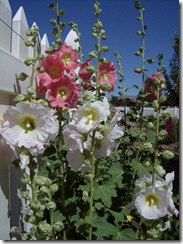
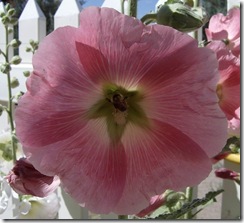
July2010 131 My hollyhocks are finally starting to bloom. They line a fence that separates our backyard with the driveway to the back pasture. I find the driveway unattractive and like to block it from view. There is a foot path on the back-yard side of the fence, so I don’t have room for tall bushes and instead make use of tall flowers and morning glories to create a wall.

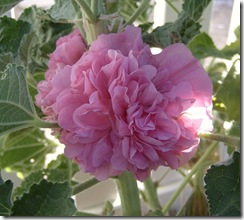
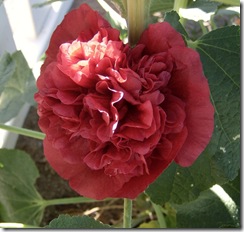
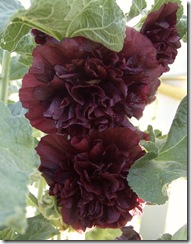
I have an odd assortment of old fashioned and double hollyhocks that have been grown from seeds, crowns, and collected seeds, some of which have since cross pollinated. The whitish ones in front have the faintest tint of pink to them; they are probably the product of the white and pink hollyhocks growing nearby. Some suggest only planting one type of hollyhock to avoid cross pollination, but I enjoy surprises!HPIM6060 - Copy (2) (To actually ensure that their isn’t any cross-pollination, no other variety of hollyhock could be grown with in at least a 1/4 mile).

They are happiest in a sunny, well ventilated area. They prefer rich soil, but it is more important for them to be planted in well drained soil. I just add lots of rich compost to my sandy soil and they are quite content. They are susceptible to rust, so I water from below to minimize their risk to the the fungus. I am hoping my husband is able to find time to install a drip line as hollyhocks like an inch of water a week and our high desert clouds cannot produce that much.

HPIM6062They are easy to start from seed. I sow mine outdoors in the fall a little more than a 1/4 of an inch deep, but you can sow the seeds indoors 6 weeks before the last frost. You can also sow them outside one week before the last frost just beneath the soil. Most hollyhocks only produce leaves the first year, so you need to be patient if you want to enjoy their beautiful flowers. Mulch them well in the fall and the following year enjoy their blooms. The flower spikes can grow up to 6 – 9 feet high, so growing them next to a fence or building provides them with some support and allows you to easily anchor them with twine if you live in an area HPIM6066with high winds.

They are short-lived perennials (mine usually live 3 years) so I always have new plants starting through out the bed. It is recommended that you allow at least 2 feet in between plants and I follow that rule for the older, larger hollyhocks. However, I do allow the seedlings to develop closer to the older plants that I am hoping to replace. Hollyhocks are pretty hardy and can withstand transplanting if you find you have several seedlings growing too close together.

Hollyhocks can also be started from crowns purchased at a garden supply store. These crowns have already gone through their flowerless, leafy year and usually produce flowers the first summer after you have planted them. Some of my hollyhocks were purchased as crowns and they are on their second year of flowers for me.

July2010 133 I have read suggestions to dead head the plants after they are done flowering as a way to increase their chances of blooming again the next year. I have not done that as I would rather collect the seeds, but my hollyhocks still come back and bloom a third year. I am not a horticulturalist, I only play one in my backyard, but I think the best way to ensure several seasons of blooms is to mulch the flowers well in the fall to protect the dormant terminal buds from damage during freezing temperatures.

To view beautiful flowers from around the world, visit  Flaunt Your Flowers Friday at Tootsie Time and don’t forget to fertilize those flowers!fertilizer Friday