Tuesday, August 31, 2010
Repurposing a Drink Bucket
~ We use the drink bucket to keep our stainless steel water bottles cold while we work in the yard. This eliminates the back and forth in dirty shoes across the kitchen floor to get ice water.
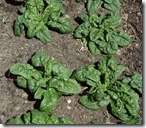
~ When I had to do an emergency harvest of my spinach plants, the bucket was the perfect place to temporarily hold the plants. I put a couple inches of water in the bucket and then harvested the spinach at my leisure.
The drink bucket is a great place to hold recently purchased flowers. A little water in the bottom ensures that they do not wilt while waiting to be planted: When I plant the flowers I just pick up the bucket and tote it around the yard with me. I place the emptied pots back in the bucket, so I only have to make one trip to my recycling/trash bins.
It also serves as a pond when my youngest son needs to a place for his ducks to swim!
Do you repurpose your drink bucket?
This post has been linked to Works For Me Wednesday.
Friday, August 27, 2010
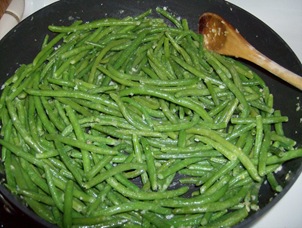
Green Beans with Garlic
The green beans have only come in dribs and drabs for most of the summer. However, I am finally harvesting them fast enough to serve green beans as a side dish, rather than merely using them as an ingredient in soup.
I prefer to eat my veggies with just enough seasoning to highlight their natural deliciousness. Not too much, otherwise the seasonings overpower or muddy the flavor. Sometimes the simplest recipes are the tastiest!
Ingredients:
1 pound of whole uncooked green beans,rinsed, ends trimmed
2 tablespoons butter
2 - 4 garlic cloves, minced
dash (or two) of coarse black pepper
Add butter and garlic to a large skillet. Cook over a medium-high heat until the butter melts. Add green beans and pepper; toss gently until beans are coated and heated through.
For more garden recipes, visit Grow.Eat.$ave at $5 Dinners.
My 3 Year Old’s Flower Garden
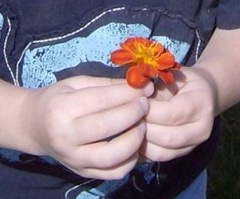
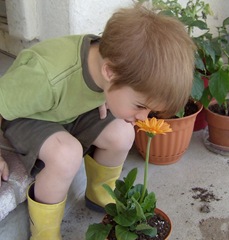
We have come to a compromise on my son’s “favoritist flower ever”: Gerber Daisies. Since his favorite flower is an orange Gerber Daisy, he is technically allowed to pick them. However, he is always very sad that they don’t last long after picked (and carried all over the yard). So I have planted his Gerber Daisies in little pots that he can carry with him without doing much damage. This solution makes us both very happy. Well, except for the fact that he now carries my container garden all over the backyard, but I am trying to remain philosophical about that. To view gardens from all around the world, visit Flaunt Your Flowers Friday at Tootsie Time.
Tuesday, August 24, 2010
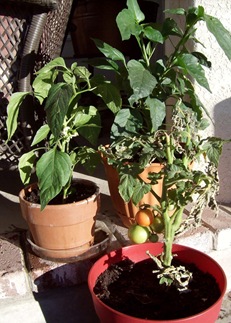
Extending Your Growing Season with a Container Garden
They look a little pathetic. Yes, I know, the tomato plant looks really pathetic. The plants were bone dry and shriveled when I bought them (The cashier looked at the plants and said, “well aren’t you a dear soul?” then looked at me like I was Mother Theresa. Or insane; it is hard to tell the two expressions apart). However, they are already showing signs of recovering with nutrient rich soil and water. The tomatoes are ripening and the plants are beginning to flower again: Once our evening temperatures start to dip into the 30’s, I bring the containers into the garage at night. I put them back out during the day, so they can benefit from the warm afternoon sun and increase their chances of being pollinated.
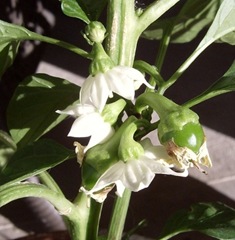
Things to consider when starting a container garden:
~ Pick the healthiest plants available. There is no reason to follow my example and rescue dying plants.
~ Look for varieties that remain fairly small. These words will often be included in their name: Compact, Space Saver, Patio, Bush. You can grow large varieties if you have large containers, they are harder to lug back and forth.
~ Select a container that will allow for root growth. I use a rule of thumb of picking a container that is at least twice the size of the plant’s root ball.
~ You will need something besides plain old dirt when potting these plants. I use a mix of 1 part compost to 2 parts commercially prepared potting mix, but any nutrient rich mix will work.
~ Ensure that your container has holes at the base to permit drainage. You can always create holes yourself by using a hammer and nail to create holes.
~ Container gardens need to be watered daily. If you are going to be away for a day or two, you will want to put the containers in a large tub with an inch of water in it or make arrangements for someone to water for you.
Container gardens are a little extra work, but eating fresh tomatoes and peppers while watching the snow fall makes it worth the effort!
Did I mentioned that I have a short growing season? What hurdles do you face when gardening?
This post has been linked to Bloomin’ Tuesday and Tuesday Garden Party.
Saturday, August 21, 2010
How to Get More from Your Square Foot Garden with Succession Planting
Same Crop Successive Gardening extends the harvest of a type of vegetable. Instead of planting all of my crop at once, as is common in traditional row gardening, I make several successive plantings. I make 3 smaller plantings of peas, 7 days apart. I plant 10 – 20 radish seeds every week, switching to a milder radish like Cheriette, when the summer heat is known to intensify the flavor of radishes. I start 4 –6 new lettuce and spinach plants every 2 weeks, and pinch leaves from the inside rather than wait to harvest a whole head. In the spring and fall I can grown any variety, once it gets hot I switch to heat tolerant plants like Buttercrunch and Spinach Mustard, then switch back to Romaine and a compact variety spinach in the fall.
Planting Different Crops in Succession ensures that you maximize your garden space. After I harvest a crop, I inspect the soil for harmful insects, replenish the soil with compost, and plant a new crop. This works best when you pair a cool weather crop with a longer season heat tolerant crop (e.g. follow broccoli and cauliflower with squash plants). Or follow a long growing crop like potatoes with a cool weather crop like kale or spinach.
Grow Different Varieties of the Same Plant to extend your harvest time. By planting tomatoes with different maturity dates, I ensure that I have a continuous supply of tomatoes without being completely swamped by plants that all ripen at the same time.
As room is created in my garden, I am adding these cool weather plants: Broccoli, Cauliflower, Radishes, Spinach, Lettuces, Kale, Peas, Turnips, Kohlrabi, Curley Spinach, and Swiss Chard.
What are you planting this fall?
To view more vegetable gardens, visit Grow.Eat.$ave at $5 Dinners.
Friday, August 20, 2010
Rose of Sharon
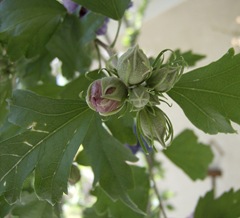
Just last week I was complaining commenting that my Rose of Sharon had not yet bloomed. Yesterday, when I walked out the door, I spied a branch that had a few blooms on it: This shrub was planted long before I moved here, so I am not sure which variety I am growing. Rose of Sharon love warm temperatures so it does not normally do well in a zone 4 climate. However, my front entrance is in the shape of a U and the one unwalled side has a line of pine trees, creating a microclimate warm enough for my Rose of Sharon to flourish: It really is as tall as my house and it is gorgeous when it is completely decked out in blooms! And yes, we do trim it back each year, but it is hard to tell from looking at it.
From the look of these buds, I won’t have long to wait: Not only does this plant bloom late, it leafs out late. If you start one this summer, do not assume the worst if it is still bare in May. It is fairly drought tolerant. We have it on a drip line and only water it 3 times a week for less than 15 minutes each time, but I do not know the flow on the drip line to tell you how much water in inches we are giving it each week. To provide more insulation during our cold winters, I let the leaves that fall around the base remain there until spring.
To view gardens from around the world, visit Flaunt Your Flowers Friday at Tootsie Time.
Tuesday, August 17, 2010
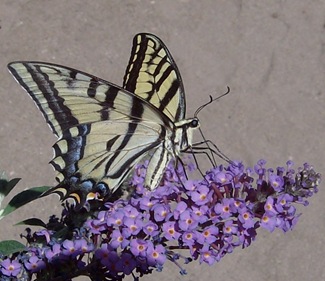
I Finally Captured a Butterfly…
This post has been linked to Outdoors Wednesday at a Southern Daydreamer.
Square Foot Garden Update: Some Like it Hot!
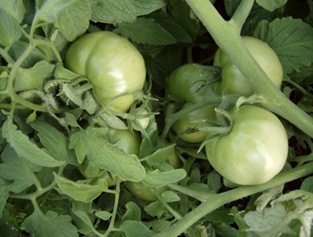
The tomatoes, peppers, and eggplant are definitely liking our hot August days. The tomatoes continue to roll in and show no sign of letting up. I have been using our surplus cherry tomatoes in Broiled Cherry Tomatoes. I am waiting for these beauties to ripen to start canning:
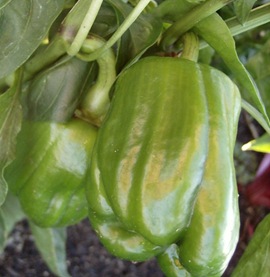
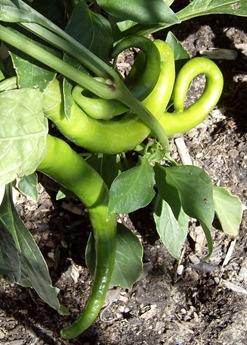
We are harvesting peppers daily: What I can’t use now I am dicing up and freezing for later. Peppers keep quite well in the freezer. This year I am growing Salsa Peppers, which are a medium-hot pepper:My husband likes hot-hot peppers and I prefer sweet red peppers. The Salsa Pepper is our compromise. I used just one small Salsa Pepper in Spicy Sesame Stir-Fry and I could definitely feel the heat!
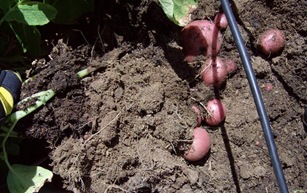
Have you eaten homegrown potatoes? They are so much tastier than store bought! I go out and dig up some potatoes whenever I need them for a meal. Our favorite way to eat them is in Herb Roasted New Potatoes.
They keep very well in the ground, so I will leave them there until I need them. I will dig up the remaining potatoes before our first freeze and store them in the garage over the winter.
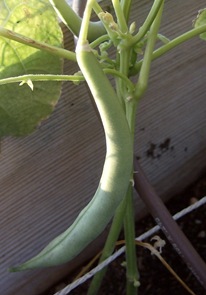
The last time I did a vegetable garden update, I ended with a green bean flower. This time I will end with a green bean: I am always amazed at how fast the vegetables develop after the plants have flowered. How are your plants getting along in the summer heat?
To view gardens from around the country, visit Bloomin’ Tuesday and Tuesday Garden Party.
Saturday, August 14, 2010
Broiled Cherry Tomatoes
This recipe is inspired by Oven Roasted Cherry Tomatoes.
Ingredients:
1 pint of cherry tomatoes
2 Tablespoons olive oil
4 cloves garlic minced
1 Tablespoon fresh basil, minced
1 Tablespoon fresh oregano, minced
1 Tablespoon fresh thyme, minced
1/2 teaspoon pepper
~1/4 cup grated cheese (optional)
Directions:
1. Set you oven heat to broil.
2. While your oven is heating up, slice tomatoes in half and place on a baking sheet, cut side up.
3. Mix oil and spices together in a small bowl. Brush each tomato with a dab of the mixture.
4. Broil for 6 minutes. Remove and top each tomato with a bit of cheese. Broil for one more minute.
Most of the tomatoes disappear as soon as they come out of the oven, but leftovers can be refrigerated. The leftovers are good eaten cold or warmed for 10 seconds in the microwave.
How do you like to prepare your cherry tomatoes?
For more ideas on how to cook up your excess tomatoes, visit $5 Dollar Dinners.
Monday, August 9, 2010
Cloudscape
The most amazing cloud formations roll over the mountains in the late afternoon. My oldest son often comes in from feeding the horses, grabs a camera, and heads out to capture the prettiest part of Nevada: The sky.
This post has been linked to Outdoor Wednesdays.
Two New Blooms
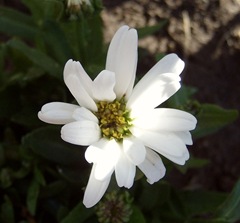
A Shasta Daisy, which is hardy to –20, in case you were wondering:
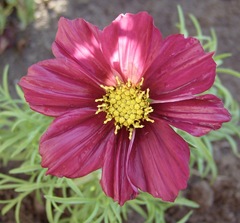
And a Cosmo, which survived an indiscriminate weeder:
I am still waiting for my gladiolas, Rose of Sharon, and mums…
To view gardens from around the country visit Bloomin’ Tuesday and Tuesday Garden Party.
Saturday, August 7, 2010
Square Foot Garden Update
I wanted to have this post up early this morning, but I became engaged in another Battle of the Bugs in my squash beds. I was the victor in this battle, but the war continues…
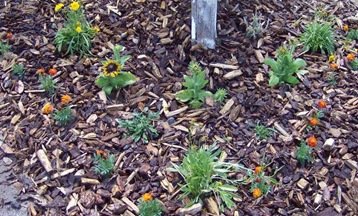
Our unusually hot, dry summer was frying my poor Everbearing Strawberries; the berries were just shriveling up on the stem. I laid down an extra thick layer of wood chips to help retain the moisture. And they’re back:
Now that is the way to show appreciation!
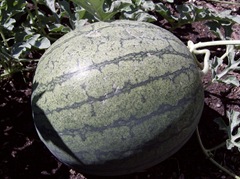
I thought I was planting a Sugar Baby Watermelon, but this does not look like one to me:
Regardless of the variety, I am relying on the old rule of thumb that watermelon signal when they are ready to be picked when the tendril dries and turns brown. Also the area resting on the ground usually changes from pale green or white to a dull beige. Based on that criteria, I believe I will be picking this watermelon within the week, two at the most. If you recognize this watermelon, please tell me what variety of you think I am growing.
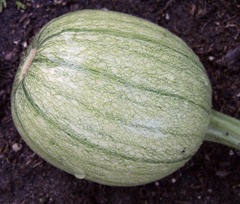
The Great Pumpkin Shortage of ‘09, reaffirmed my decision to grown my own baking pumpkins. It also was a great reminder that, as a backyard gardener, I am not at the mercy of fluctuating market prices.I grow Small Sugar Pumpkins, and even though they are ready for harvest in about 100 days, that is pushing it with our short growing season. To buy the plants a little more time, I start seeds inside several weeks before our last frost.
I still do not have green beans, but at least I have flowers:
I am putting together a resource list of gardeners by zone and region. If you would like to be included, please tell me your URL, zone, region, and the specific type of gardening that you engage in when you leave a comment (I would put : http://www.ondeterminedgardener.com/, Zone 4, High Desert, square foot gardening and drought tolerant ornamentals).
To see what is growing in vegetable gardens around the country, visit $5 Dinners.
Friday, August 6, 2010
Home Depot Garden Club
I have shared with you before, how I joined the Home Depot Garden Club a little over a year ago. Once a month they email me coupons like a BOGO bag of bulbs or BOGO rose bushes, as well as high value $3 - $5 off coupons. When you sign up they also ask for your zip code so they can tailor gardening tips to your region. You can register here to join this free garden club.
How To Squash a Bug: A Tutorial for the Squeamish
Let me start by saying that I am not normally a violent person. If there must be a death, I prefer bloodless deaths (i.e. avalanche scene in Mulan). And I took 2 years of horticulture, just to get out of dissecting a frog. Seriously.
Today, instead of flaunting my flowers, I am flaunting my ability to squash bugs without ever touching them. My daughter said, “I’m sure lots of other people use the same method, they just don’t publicly acknowledge it”. She is probably right, but I have decided to share my method on the off chance that you are in need of a touchless bug removal system.
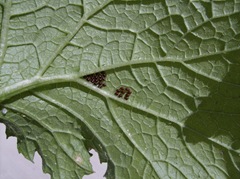
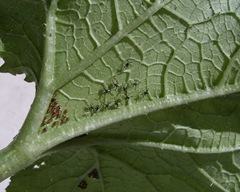
I have been battling squash bugs for a little while this summer. Since I prefer bloodless deaths, I try to remove and destroy as many eggs as possible. They often lay their eggs in the V of the squash leaves:
I either tear or cut that portion of the leaf off.
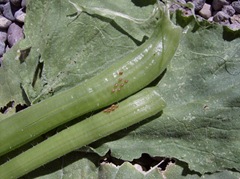
Sometimes they lay eggs on the stem:
You can either scrape them off or remove the stem.
Once they have hatched, I escalate to organic insecticidal soap:
You want to make sure there is not any collateral damage, so you don’t want your insecticide to be too strong. To make Insecticidal Soap Spray, combine 2 tablespoons Dr. Bronner’s Liquid Peppermint Pure-Castile Soap with 1 quart water in a spray bottle.
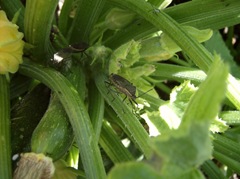
If they survive to adulthood, I flush them out by watering the plants which causes them to move to the top of the plant: Then I take a piece of leaf in my hand:
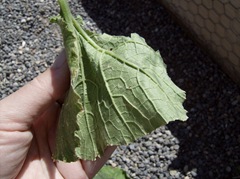
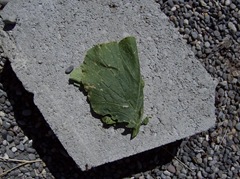
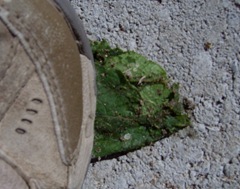
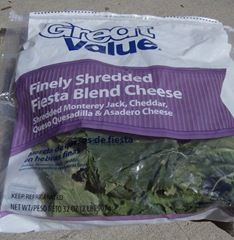
And use the leaf to catch the bug: Then I place the folded leaf on a stone: And use my shoe to smash it: I put all the leaves, stems, and crushed bugs into a plastic bag like the one that blew into my yard on trash day:
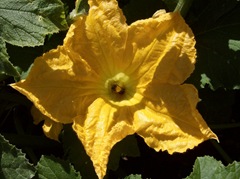
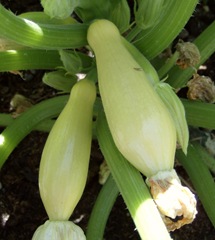
When your plants are done producing, remove them immediately to lessen the chance of another infestation next year. Because instead of dying plants and ugly bugs, you want to see bees pollinating your squash flowers: So that you have an abundant harvest: I am not proud of either my squeamishness or my new prowess, but I do hope this helps you if your garden is ever invaded. Now go visit Tootsie Time to view gorgeous gardens from around the world.
What organic methods of pest control do you use in your garden?
Wednesday, August 4, 2010
FireSet
When I was looking through photos for my post on Gardening with Children, I discovered this picture. My oldest son took it last year during “fire season”. I seriously hope he does not have an opportunity to take a similar picture this year! My friends up in Truckee, CA often say they have two seasons: winter and construction. Do you have the traditional four seasons or are your seasons unique to your region?
Less depressing pictures that my son has taken facing the same mountain range:
This post has been linked to Outdoor Wednesday.